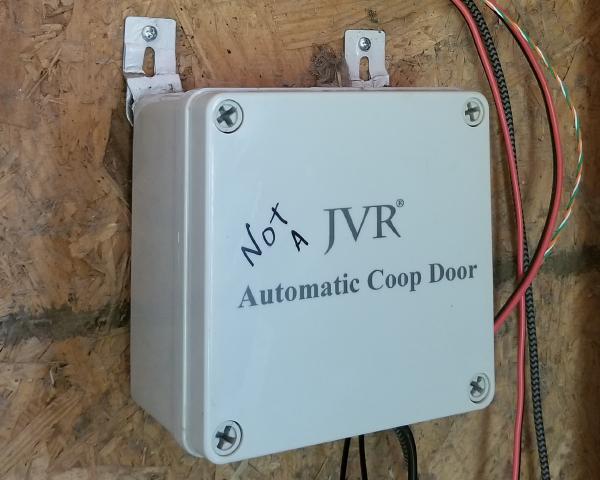
So the wife picked up a JVR automatic coop door a couple of years ago. She sprung for the more expensive one that was wi-fi enabled, but we never really able to get the setup handled, and ended up using the pushbutton remote to open and close the “automatic” coop door manually. That is until it stopped doing even that.
Enter the Raspberry Pi
Since they were so cheap, my brother or I would pick a up few Raspberry Pi Zeros any time we found ourselves in a Microcenter, so I have a stack of them in a box just waiting for a job. It’s a simple job, for the most part, turn on the motor of a linear actuator in the morning, then in the evening turn that same motor on in the opposite direction. For that, though, I’d need to set up an interface between the Pi and the motor. There are plenty of shields and IO boards already that could handle this for me, but I have boxes full of pieces parts, and I’m cheap. Kinda…
But what does that mean for the chicken coop?
That means I have a fully functional micro-computer running it now, using the same server-grade operating system that I do on my SAS70 compliant servers I run at work.
That’s great and all, but what is SSH?
A few people have asked what the heck “SSHing” is, so here ya go. SSH is short for “Secure Shell”, and it’s a command line interface used to access the operating system on the Raspberry Pi remotely. If you’ve ever had to run a command prompt to fix anything on your computer, or if you’re (gasp) old enough to remember DOS, it’s effectively the same kinda thing, only I can access it from anywhere in the world that I have an internet connection.
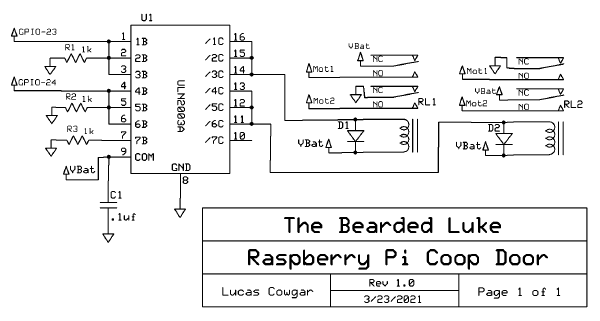
The schematic is easy enough to deal with, just a darlington array to drive a couple of relays, and we’re good to go. Since the chicken coop can get pretty warm, though, I decided to spread out the load and use a few channels on the array for each relay. I later added a second array so that I could set up some other outputs to use at a future date, maybe some outdoor LED lighting, that’s not shown on this schematic. The same idea, though, except the collectors on the darlington array are connected to terminal blocks instead of relays.
I went full-on prototype for this. Since it’s a one-off, I didn’t lay out a board or anything, just a protoboard with point-to-point wiring underneath.
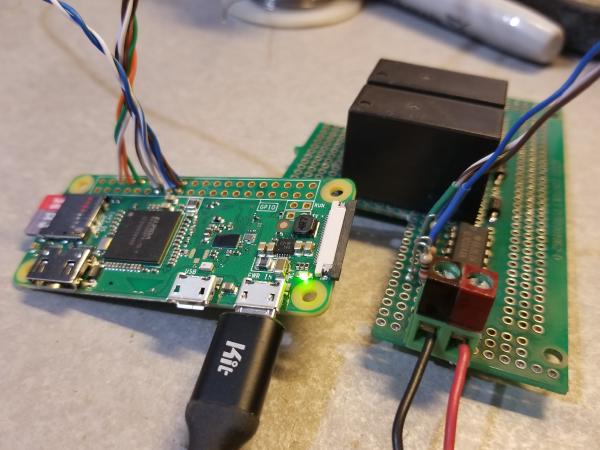
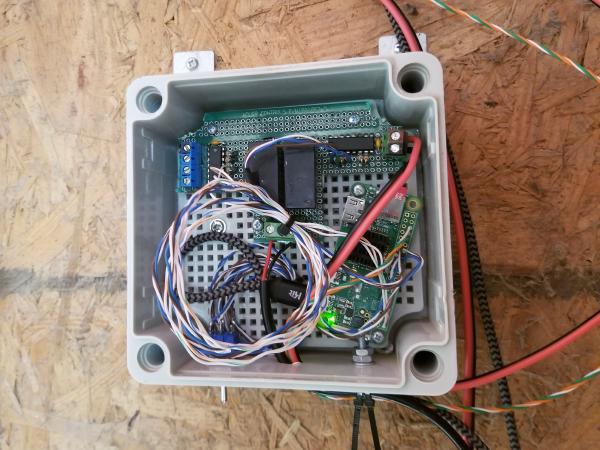
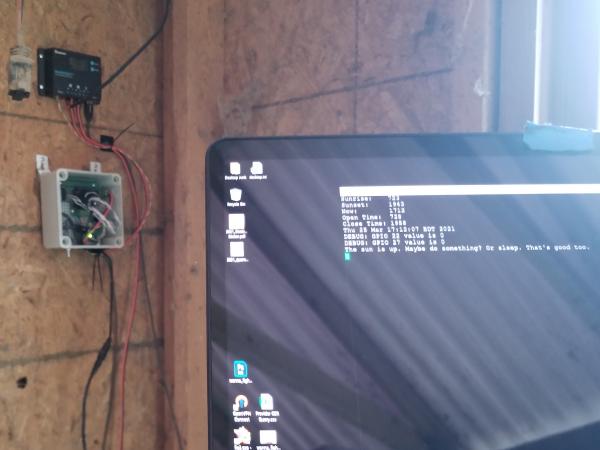
Since I also had this handy weatherproof box from the previous control system, seemed a shame to waste it. You can also see the second darlington array there to the left of the board, and the terminal block for those IO channels.
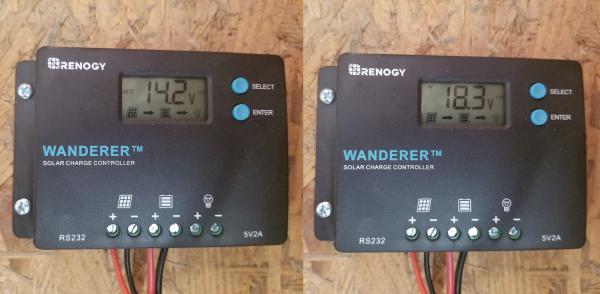
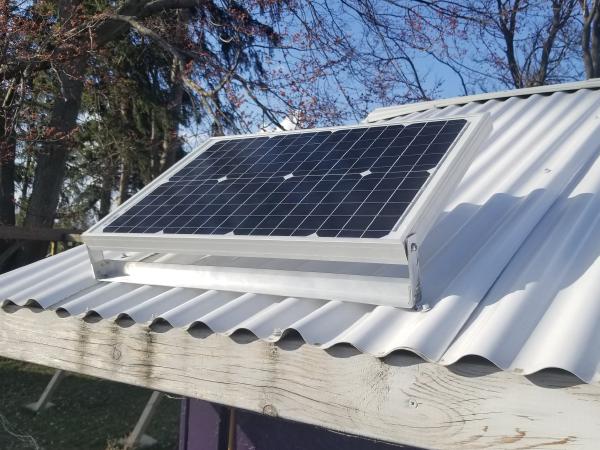
Of course, we need a way to power it, too, and we don’t want to leave the chicken’s safety up to the power company, so I tossed some solar to it. I had some 6v lead-acid gel cells that I picked up from Lowe’s a while ago on clearance, 75% off! PERFECT job for those things, and I picked the charge controller and solar panel up from Amazon. I rigged up a quick bracket from some aluminum L angle from Lowe’s, using some solid rivets I had laying around from Aircraft Spruce.
Now that we’re all hooked up, I can finally SSH into the chicken coop!
The linear actuator that came with the coop door shuts itself off at the end of its travel, so there’s no need for me to do any positional sensing, thankfully. I wrote a quick bash script that uses hdate to calculate the sunrise and sunset times for my lat/lon for each day and applies a configurable offset to those times. The script enters a continual loop, checking current time against the sunrise/sunset times given by hdate, and triggers the associated GPIO for 60 seconds once that time +/- offset is hit. The script also tracks the status of the door, so if anything weird happens like it rebooting when it should be moving, it’ll pick back up where it left off and move the door to where it should be.
If you’re interested in working with the GPIOs in bash, I wrote some helpers to make my code a little cleaner, and they’re available in my bitbucket repo for the GPIO helpers. It’s not perfect, and I need to expand it some, but you may find it useful.
Materials List
Disclaimer: I’m not getting paid for these links, these are just the tools we used. None of these retailers are comping me anything.
Electronics
- Raspberry Pi Zero W
- ULN2003A
- (3) 1k Resistors
- (2) 12v DPDT Relays
- (2) General Purpose Diodes
- (2) 2 position Terminal Blocks
- .1uf ceramic cap
- Prototyping board
- Micro USB Cable
- Hookup Wire
Solar Hardware
- Newpowa 30W Monocrystalline Solar Panel
- Renogy Wanderer 10 Amp 12V/24V PWM Solar Charge Controller
- (2x) 6v 4.5AHr Lead-Acid Batteries (Could/should do this with any appropriately sized 12v rechargable, just happened to have a bunch of these 6v laying around)